

Boats are meant to provide enjoyment and adventure on the water, but a leaking hatch can turn a pleasant outing into a frustrating experience. One of the most common issues boat owners face is water intrusion through hatches, which can lead to damaged interiors and costly repairs. Proper maintenance and timely resealing of boat hatches are essential for the longevity of your vessel and the safety of your passengers.
In this step-by-step guide, we will walk you through the process of resealing leaking boat hatches, highlighting the necessary tools and materials required for the job. Whether you are a seasoned sailor or a novice boater, understanding how to effectively seal your hatches will empower you to take control of your boat’s maintenance.
From identifying the source of the leak to applying a new sealant, following these straightforward instructions will ensure a watertight closure for your boat hatches. Let’s dive into the essential techniques that will help you keep your vessel dry and ready for your next adventure.
Identifying the Source of the Leak in Your Boat Hatch
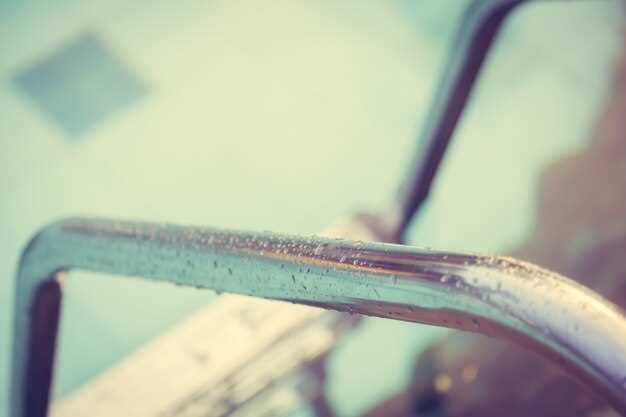
Before proceeding to reseal your boat hatch, it is crucial to identify the exact source of the leak. Understanding where the water is entering allows for a more effective repair process. Here are the steps to locate the leak:
- Visual Inspection:
Begin with a thorough visual inspection of the hatch, including all seals and surrounding areas. Look for:
- Cracks or splits in the hatch material.
- Worn or missing seals and gaskets.
- Corrosion around hardware and mounting points.
- Water Test:
If the source isn’t immediately clear, conduct a water test:
- Close the hatch and pour water over it using a hose.
- Observe if any water seeps in, and note the location.
- Check for leaks from above and around the hatch.
- Check Hardware Connections:
Inspect all screws, hinges, and latches. Loose or damaged hardware can compromise the seal integrity:
- Ensure all screws are tight and replace any that are rusty.
- Check the integrity of mounting brackets.
- Assess the Surrounding Structure:
Sometimes the issue may not stem from the hatch itself but from surrounding areas:
- Inspect the deck around the hatch for signs of rot or damage.
- Look for any cracks or holes that might allow water movement.
Identifying the source accurately is key to ensuring a successful reseal. Once you have pinpointed the cause of the leak, you can take appropriate measures to repair it effectively.
Gathering the Necessary Tools and Materials for Resealing
To effectively reseal leaking boat hatches, it’s crucial to gather the right tools and materials beforehand. This preparation will ensure a smooth and efficient process, minimizing the chance of future leaks.
First, you’ll need a high-quality marine sealant specifically designed for use in marine environments. These sealants provide strong adhesion and flexibility, essential for withstanding the constant motion and temperature changes that occur on water.
Next, gather a caulking gun to apply the sealant. A standard caulking gun will allow you to control the flow and thickness of the sealant, ensuring an even application around the hatch edges.
A utility knife or razor blade will be necessary for cleaning old sealant from the hatch area. This step is important to ensure that the new sealant adheres properly to a clean surface.
Additionally, have a putty knife on hand. This tool is useful for smoothing the sealant after application, allowing for a neat finish that can help prevent water intrusion.
Don’t forget about cleaning supplies, such as rags or paper towels, to wipe away excess sealant and keep the work area tidy. Acetone or mineral spirits can also be beneficial for cleaning any remaining residue before applying the new sealant.
Lastly, protective gear such as gloves and safety glasses is recommended. These items will help protect your skin and eyes from any chemicals in the sealant and provide comfort during the resealing process.
By assembling these essential tools and materials, you will be well-prepared to tackle the task of resealing your boat hatches and effectively eliminate leaks.
Applying the Resealant to Ensure a Watertight Seal
To achieve a truly watertight seal around your boat hatch, selecting the right resealant is crucial. Opt for a high-quality marine-grade sealant specifically designed for use in marine environments, as these products resist deterioration from saltwater, UV rays, and temperature fluctuations.
Before applying the resealant, ensure that the surface is clean and free of old sealant, dirt, or debris. Use a scraper or a putty knife to remove any remnants of the previous seal and then clean the area with a solvent to eliminate any residue. Allow the surface to dry completely before proceeding, as moisture can prevent proper adhesion.
When you are ready to apply the resealant, cut the tip of the sealant tube at a 45-degree angle to create an opening that matches the width of the joint. Use a caulking gun to apply an even bead of sealant around the perimeter of the hatch frame. It’s important to apply enough sealant to cover any gaps without overfilling, which can lead to a messy application.
Once the sealant is applied, use your finger or a caulking tool to smooth the bead, ensuring it adheres well to both the hatch and the boat surface. This smoothing process enhances the seal’s appearance and effectiveness by eliminating air pockets that can lead to leaks.
After application, allow the resealant to cure as per the manufacturer’s instructions. Curing times can vary, so be sure to avoid exposing the area to water until the sealant is fully set. Regularly inspect the hatch seal for signs of wear and reapply as necessary to maintain a watertight environment on your boat.


