

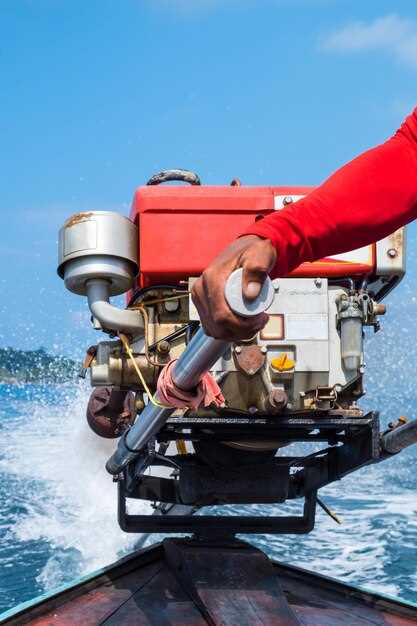
Maintaining your boat’s engine is crucial to ensure smooth sailing and optimal performance. One key component of this maintenance is the fuel filter, which plays a vital role in keeping your engine free from harmful impurities. Over time, fuel filters can become clogged with dirt, rust, and debris, potentially leading to engine issues if not replaced regularly.
It is essential to be aware of when to replace the fuel filter to avoid disruptions during your boating adventures. Factors such as the type of fuel you use, the frequency of boat usage, and the quality of your fuel all affect the lifespan of your fuel filter. Regular inspections can help you identify when a replacement is necessary, ensuring that your engine continues to run reliably.
By understanding the signs of a failing fuel filter and adhering to a regular maintenance schedule, you can safeguard your engine from damage and maintain efficient fuel flow. In this article, we will outline the key indicators that it’s time to replace your fuel filter, along with best practices for keeping your boat’s fuel system in top condition.
Signs Your Boat’s Fuel Filter Needs Replacement
Identifying when your boat’s fuel filter requires replacement is essential for maintaining optimal engine performance. One of the primary signs is a noticeable decrease in engine power. If your boat struggles to accelerate or reaches lower speeds than usual, it may indicate that the filter is clogged and restricting fuel flow.
Another indication is frequent stalling or difficulty starting the engine. If your boat experiences unexpected shutdowns or requires multiple attempts to ignite the engine, a compromised fuel filter may be the culprit. Additionally, if you observe a rough idle or inconsistent engine performance while cruising, it might suggest that the filter is unable to provide a steady supply of fuel.
Inspecting the fuel filter itself can also reveal significant issues. Look for discoloration, dirt accumulation, or any visible damage. If the filter appears dirty or contaminated, it should be replaced to prevent further engine complications.
Lastly, if your boat has been operating under harsh conditions or if it has been a while since the last replacement, it’s prudent to check the filter. Regular maintenance checks are vital for ensuring your engine operates smoothly and reliably.
Recommended Maintenance Schedule for Fuel Filters
Regular maintenance of fuel filters is crucial for ensuring the longevity and efficiency of your boat’s engine. It is generally recommended to inspect and potentially replace your fuel filters at least once a season. However, the frequency can vary based on your boat usage, engine type, and fuel quality.
If you are using your boat frequently, consider checking the fuel filter monthly to ensure it is not clogged with debris or impurities. For those who operate in areas with lower fuel quality or higher sediment levels, more frequent changes may be necessary. In these cases, a bi-monthly inspection can help prevent engine performance issues.
Additionally, if you notice a decrease in engine performance, such as rough idling or difficulty starting, it may indicate that the fuel filter is dirty and needs to be replaced. Always keep an eye on the fuel gauge; a rapid drop in fuel consumption can signal filter issues.
Consult your boat’s owner manual for specific recommendations related to your engine type, as different models and brands may have unique requirements for filter maintenance. Following this recommended schedule will help ensure your boat’s fuel system is functioning correctly and your engine is running smoothly.
Steps to Replace a Fuel Filter on Your Boat Engine

1. Prepare the Area: Begin by ensuring your boat is securely docked and the engine is turned off. Allow the engine to cool down to avoid any burns during the replacement process. Clear the work area of any unnecessary items to have ample space for the task.
2. Gather Tools and Materials: Collect the necessary tools including a wrench, a screwdriver, and a replacement fuel filter suitable for your boat engine. It’s crucial to have a clean cloth or paper towels on hand to wipe any spills.
3. Locate the Fuel Filter: Identify where the fuel filter is situated on the engine. This is typically found along the fuel line. Consult your owner’s manual if you’re having difficulty locating it.
4. Disconnect the Fuel Lines: Carefully loosen the fittings on both sides of the fuel filter using your wrench. Always be cautious, as some fuel may leak out during this process. Use the cloth to catch any dripping fuel and prevent spills.
5. Remove the Old Filter: Once the fuel lines are detached, remove the old filter from its bracket or mounting. Make sure to note the orientation of the filter for correct installation of the new one.
6. Install the New Filter: Position the new fuel filter according to the noted orientation. Secure it in place, ensuring it is fitted correctly to avoid leaks.
7. Reconnect the Fuel Lines: Attach the fuel lines back to the new filter, tightening them carefully to ensure a secure fit. Double-check that both connections are tight and properly aligned.
8. Check for Leaks: Before starting the engine, turn the fuel supply back on and inspect the connections for any leaks. If any fuel is seeping out, tighten the fittings as necessary.
9. Start the Engine: Turn on the boat engine and let it run for a few minutes. Monitor the fuel filter and lines for any signs of leaks during this time. This is crucial to ensure your installation was successful.
10. Clean Up: Once you’ve confirmed everything is functioning properly, dispose of the old fuel filter and clean the work area. Store your tools and ensure any spilled fuel is dealt with properly to maintain a safe environment.


