

Giving your boat hull a fresh coat of paint is essential for maintenance and aesthetics. One of the most important aspects of painting is ensuring that the bottom of your boat is well-protected from the elements. With proper techniques and materials, you can effectively rejuvenate your hull at home, avoiding the costs of professional services.
In this guide, we will walk you through the step-by-step process of painting your boat hull, from preparation to the final coat. Understanding the materials needed and the specific techniques for painting the bottom of your boat can not only enhance its appearance but also prevent wear and tear over time.
Whether you own a small dinghy or a larger vessel, this article will provide you with practical tips and detailed instructions to confidently tackle the task. Prepare to transform your boat hull and ensure it remains a source of pride and joy on the water!
Preparing the Boat Hull for Painting: Cleaning and Sanding
Before applying the first coat of paint, proper preparation of the boat hull is essential for achieving a smooth and durable finish. The cleaning process begins by removing any dirt, grime, or marine growth from the bottom. This can be accomplished using a pressure washer or a scrub brush, ideally with a non-toxic cleaner specifically formulated for boats. Focus on areas where algae or barnacles may accumulate, as these can hinder paint adhesion.
Once the hull is clean, the next step is sanding. Sanding helps to smooth out imperfections and create a surface that paint can adhere to effectively. Use medium-grit sandpaper for this task, ensuring you sand every section of the hull thoroughly. Pay close attention to areas that may have old paint or are uneven. After sanding, wipe the hull down with a damp cloth to remove any dust and debris created during the process.
It’s crucial to ensure that the surface is completely dry before proceeding with any painting. Moisture can lead to poor adhesion and can cause the new paint to peel off over time. After the hull has dried completely, inspect the surface one more time to ensure it is appropriately prepped for the upcoming coat of paint, setting the stage for a successful painting project.
Choosing the Right Bottom Coat: Types and Application Methods
When painting your boat hull, selecting the appropriate bottom coat is crucial for ensuring longevity and performance. The bottom coat protects the hull from marine growth, corrosion, and other environmental factors. Here, we will explore the various types of bottom coats and their application methods.
Ablative Coatings are popular for recreational boats. These coatings gradually wear away as the boat moves through water, exposing fresh paint underneath. They are effective in preventing barnacles and algae build-up. Application typically involves prepping the hull surface, using a primer, and then applying multiple layers of the ablative coat.
Hard Bottom Paints provide a durable finish. Unlike ablative options, these maintain their thickness and are ideal for boats that stay in the water for extended periods. They can be more challenging to remove when it’s time to repaint. The application method involves sanding the hull, applying a primer, and then applying the hard coat in a well-ventilated area to avoid fumes.
Epoxy Coatings offer excellent protection against moisture and corrosion. This type is often used as a base layer under other bottom paints due to its strong adhesion properties. The application involves sanding the hull, applying a suitable epoxy primer, followed by the epoxy paint itself. It is essential to mix the components thoroughly and to work within the specified pot life for optimal results.
Barrier Coats serve as a protective sheath against osmotic blistering. They are especially crucial for fiberglass hulls. The application method requires thorough surface preparation, followed by extensive layering of the barrier coat to create an impermeable barrier.
Before deciding on the type of bottom coat, consider your boat’s use, how long it will remain in the water, and the local marine environment. Proper surface preparation is vital for any application type, ensuring maximum adhesion and performance. Address any existing hull damage before applying the bottom coat, and follow manufacturer recommendations for the best results.
Applying the Topcoat: Techniques for a Smooth and Durable Finish
Once you have completed the preparation and applied the primer and base coat on your boat hull, it’s time to focus on applying the topcoat. This final layer is essential for protection against UV rays, water, and other elements. Here are several techniques to ensure a smooth and durable finish.
First, choose the right paint for your topcoat. Marine-grade paint offers superior durability and resistance to harsh conditions. Select a topcoat that complements the bottom and base coat in terms of compatibility and adhesion.
Before applying the topcoat, ensure that the base coat is fully cured according to the manufacturer’s instructions. This is crucial for achieving an optimal bond between layers. Lightly sand the surface of the base coat using fine-grit sandpaper to create a suitable texture for the topcoat to adhere effectively.
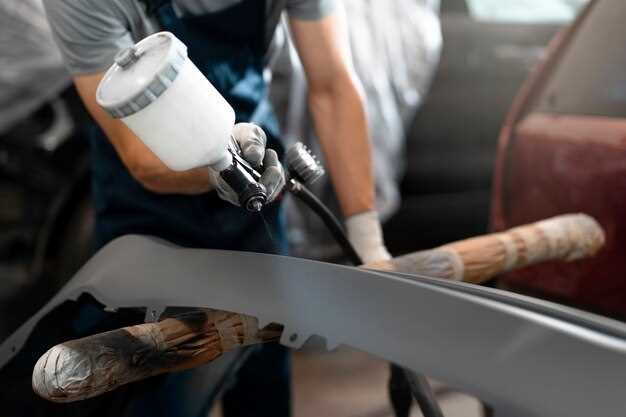
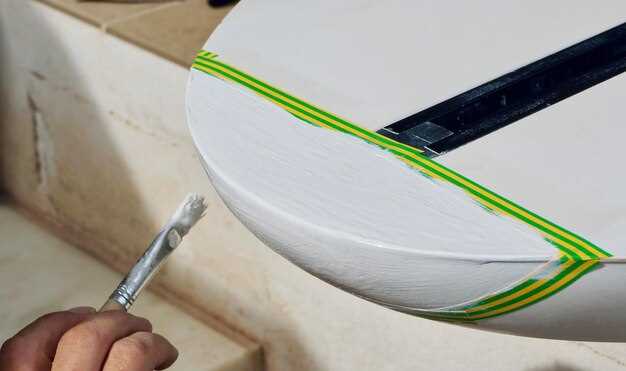
When it comes to the application technique, using a high-quality brush or roller can significantly enhance the finish. For larger areas, a foam roller can provide a smooth application, while a brush is ideal for detailed work and edges. If you prefer a spray application, use a quality spray gun and maintain a consistent distance from the surface to avoid runs and drips.
Work in thin layers, applying multiple coats as needed. Thin layers dry quicker and help avoid issues related to pooling or sagging. Allow adequate drying time between coats, which may vary based on the product used and environmental conditions.
Additionally, consider the environmental conditions when painting. Avoid windy days to prevent dust and debris from settling on the wet surface. Ideally, work in a controlled environment where temperature and humidity are regulated to ensure optimal curing and finish quality.
Finally, after the final topcoat is applied and fully cured, you can consider buffing the surface to enhance shine and smoothness. A polished finish not only looks impressive but also adds an extra layer of protection to your boat hull.


