

Maintaining your boat trailer is essential for ensuring the safety and longevity of both your trailer and your boat. Over time, trailers can suffer from wear and tear due to exposure to the elements, resulting in rust, dents, and other forms of damage. Repairing your trailer not only enhances its appearance but also prevents more significant issues that can arise from neglect. This article will guide you through the reparative process and the techniques needed to rejuvenate your trailer, making it look as good as new.
Painting your trailer can seem like a daunting task, but with the right approach and materials, it can become a simple and rewarding experience. Whether you’re looking to touch up small areas of rust or give your entire trailer a fresh coat, the steps outlined in this guide will ensure that your project is successful. By following our tips, you’ll learn how to prepare your trailer for painting, select the best materials, and apply your paint effectively to achieve a professional finish.
Ultimately, taking the time to repair and paint your boat trailer will not only enhance its aesthetic appeal but also increase its functionality and safety on the road. With a little effort and the right guidance, you can keep your trailer in prime condition for years to come.
Step-by-Step Guide to Reinforcing Your Boat Trailer Structure
Reinforcing your boat trailer is essential for ensuring its durability and safety. Follow this comprehensive step-by-step guide to effectively strengthen your trailer’s structure while considering repair and repainting needs.
Step 1: Inspect the Trailer
Begin by thoroughly examining your boat trailer for any signs of rust, corrosion, or structural damage. Pay close attention to the frame, axle, and cross members. Document any areas that require repair as you plan for reinforcement.
Step 2: Gather Necessary Materials
Collect all required materials, including metal reinforcement plates, bolts, nuts, and high-quality paint for repainting. Ensure you have the appropriate tools, such as a drill, wrenches, and a welding machine if needed.
Step 3: Remove Damaged Sections
If you identified any compromised areas during your inspection, carefully cut or grind away rusted or weakened sections using metal cutting tools. Ensure that you maintain the integrity of surrounding structures during the removal process.
Step 4: Apply Reinforcement Plates
Position metal reinforcement plates over the exposed areas, ensuring they are properly aligned with the existing trailer structure. Secure plates using bolts or welding to create a strong bond. This step will help to distribute weight and reduce structural stress during use.
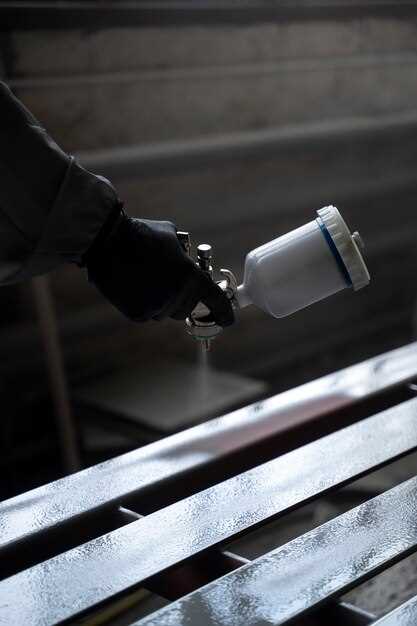
Step 5: Apply Protective Coating
Once repairs are complete, clean the entire trailer surface thoroughly to remove dirt and debris. Then, apply a rust-inhibiting primer followed by a durable paint suitable for metal surfaces. Repainting your trailer not only enhances aesthetics but also provides an additional layer of protection against environmental damage.
Step 6: Reassemble and Test
After the paint has adequately dried, reassemble any components that were removed earlier. Conduct a thorough inspection of the entire trailer, ensuring all bolts and fittings are secure. Perform a test run with your boat attached to ensure the trailer functions correctly and safely.
By following these steps, you can effectively reinforce your boat trailer structure and improve its longevity. Regular maintenance and periodic repainting will keep your trailer in optimal condition, providing peace of mind on the road.
Choosing the Right Paint and Materials for Maximum Durability
When it comes to repainting and repairing your boat trailer, selecting the appropriate paint and materials is crucial for ensuring longevity and resilience against harsh marine conditions. The right choices can significantly enhance the trailer’s lifespan, protecting it from rust, corrosion, and wear.
First and foremost, opt for marine-grade paint specifically formulated to withstand exposure to water, UV rays, and salt. These paints often contain anti-corrosive properties and are designed to adhere well to metal surfaces, providing a tough, protective coating. Epoxy-based paints are particularly effective due to their strong adhesion and durability, making them a popular choice for trailers that frequently interact with water.
In addition to choosing high-quality paint, consider employing a primer that enhances adhesion and further safeguards the metal from corrosion. A rust-inhibiting primer is ideal as it forms a protective barrier between the metal and environmental factors, significantly extending the life of your repair and repainting efforts.
When repairing any damaged areas on your trailer, ensure you use rust-resistant materials, such as stainless steel or galvanized components, wherever possible. This choice will minimize future maintenance and reduce the likelihood of further damage. Additionally, incorporate sealants in areas where components join or where there are potential water ingress issues. A good sealant will prevent moisture build-up and protect the structural integrity of the trailer.
Finally, don’t forget the importance of surface preparation before repainting. Thoroughly clean the surface to remove any grease, dirt, or old paint. Sanding rough spots and filling in cracks or dents will contribute to better adhesion of both primer and paint, resulting in a smoother and more durable finish.
By carefully selecting the right paint and materials for your boat trailer, you can ensure that your repairs and repainting efforts lead to maximum durability and protection, saving you time and money in the long run.
Common Trailer Issues and How to Fix Them Like a Pro

Trailers are essential for transporting boats, but they can encounter various issues over time. Understanding common trailer problems and knowing how to repair them will ensure your trailer remains in excellent condition.
One frequent issue is rust on the trailer frame. To address this, start by inspecting the entire frame for any signs of corrosion. Remove rusted areas using a wire brush or sandpaper, then apply a rust-inhibiting primer and finish with marine-grade paint to protect against future corrosion.
Tire wear is another common concern. Regularly check your trailer tires for uneven wear, cracks, or low pressure. If you find any problems, replace the affected tires immediately. Maintaining the correct tire pressure is crucial for ensuring safe towing and prolonging tire life.
The brakes on your trailer are vital for safe stops. If you notice that the brakes are not responding effectively, check the brake fluid level and inspect the lines for leaks. Replace any damaged components and bleed the brakes to restore functionality. Make sure to test the brakes before taking the trailer back on the road.
Electrical issues can also arise, especially with trailer lights. If your lights flicker or do not work, inspect the wiring for frays or breaks. Clean the connectors and ensure they are tight. If necessary, replace the bulbs and consult the wiring diagram to repair any damaged wiring.
Finally, check the coupler and safety chains. A loose coupler may cause the trailer to detach while in motion, which can be dangerous. Tighten the coupler and ensure the safety chains are properly secured and not worn. Regularly inspect these components to avoid accidents on the road.
By addressing these common trailer issues with proactive repairs, you can maintain a safe and reliable trailer for all your boating adventures.


